Learn
Custom PDF Templates: Build a Premium Branded Report
Design a dark, full-bleed branded report — wordmark, serif typography, brand colors, and a full-page background — in the custom template builder, then reuse it across the app and the API.
A custom template turns plain Markdown into a document that looks like it came from a design studio — your wordmark, your typography, your colors, edge to edge. Build it once, and every report, proposal, or brief you export afterwards is on-brand in a single click.
This guide walks through one complete example end to end: Aurelia, a dark, full-bleed brand-strategy report of the kind agencies and consultants send to clients who expect the deliverable to feel as considered as the work. Follow the steps and you’ll have your own version saved to your account — and a recipe you can adapt for invoices, pitch decks, statements of work, and more.
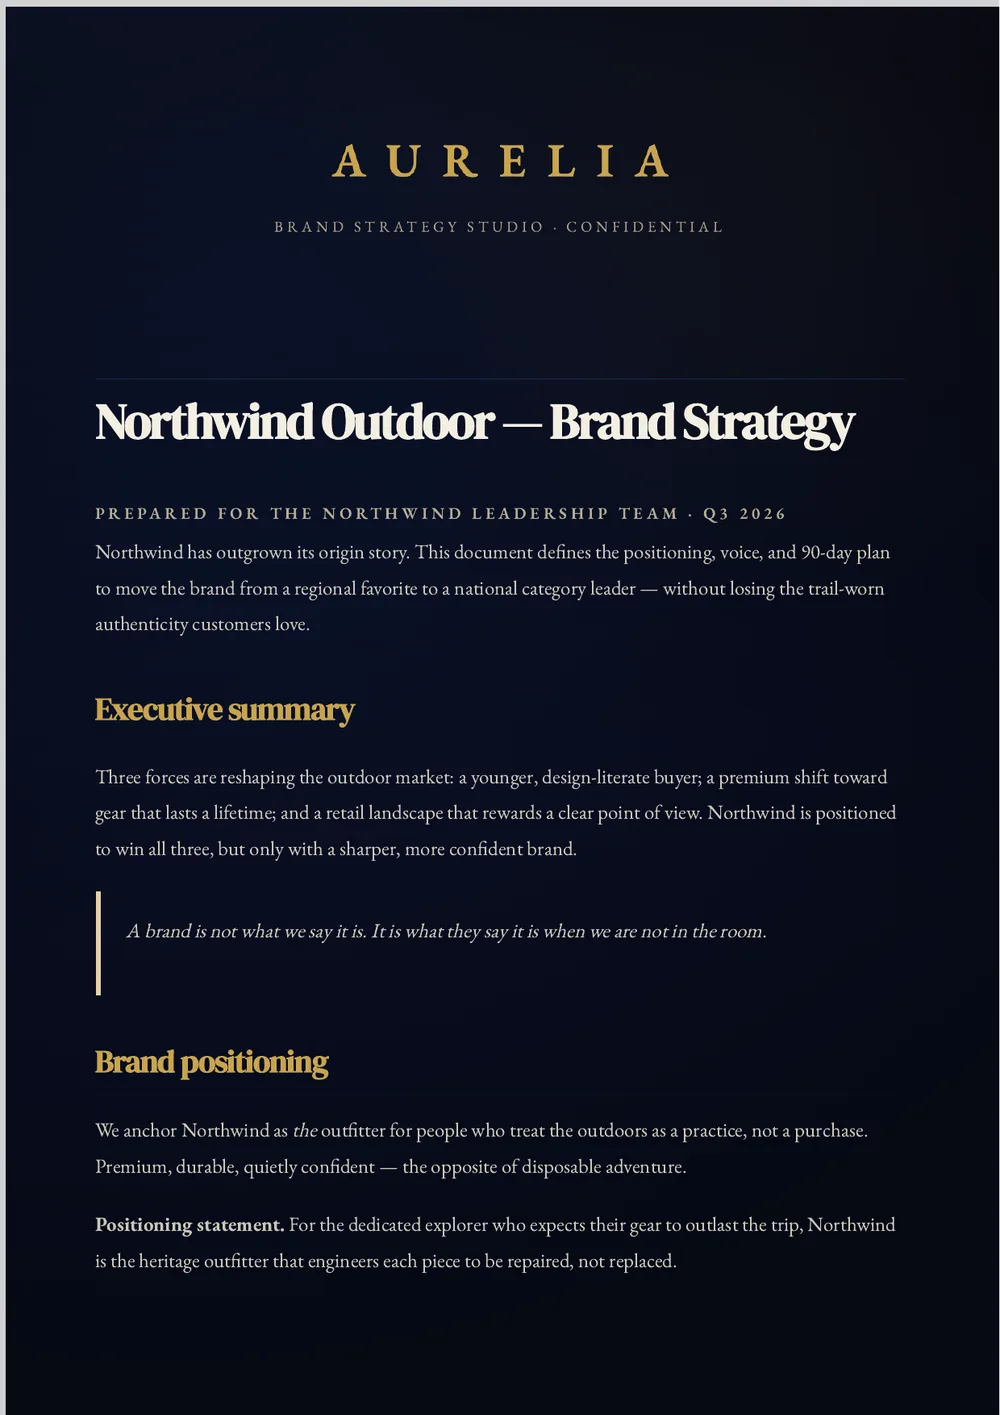
The finished result — rendered from ordinary Markdown through your saved template.
What you’ll build
Aurelia is deliberately “expensive looking,” and every part of it is something you control in the builder:
- A full-bleed background — a deep navy gradient that reaches every edge of the page.
- A gold wordmark masthead and a small, letter-spaced confidentiality line.
- Serif typography — a high-contrast display face for headings, a refined book serif for body text.
- A brand palette — warm gold headings, cream body text, a gold-ruled pull quote.
- Real document structure — an executive summary, a positioning matrix table, and a roadmap — all styled to stay legible on a dark page.
Before you begin
- Sign in to your account. The builder lives at Dashboard → Template builder.
- A paid plan is recommended. Designing and saving templates is free, but exporting without the watermark — and using a premium base such as Executive — requires a paid plan.
- Prepare two assets:
- A logo or wordmark as a transparent PNG. A wide, short wordmark (for example 1200×170) reads beautifully as a slim masthead.
- An optional background image sized to A4 portrait (about 1240×1754). A dark, low-contrast gradient or texture works best — busy photos fight your text.
Tip: no background image handy? A solid dark Background color alone still triggers the premium dark styling described below, so you can build the entire template without uploading anything.
Step 1 — Open the builder and name your template
Open Dashboard → Template builder. You’ll see three areas: the Template library on the left, the page canvas in the middle, and the Template inspector on the right, where all editing happens.
In the inspector:
- Set Name to
Aurelia — Brand Strategy Report. - Add a short Description so you recognize it later.
- Set Base template to Executive — a refined base with elegant heading rules and a strong table style.
- Tick Set as default template if you’d like it pre-selected in the converter.

The three-panel builder. Everything you change in the inspector updates the page instantly.
Step 2 — Add a full-bleed page background
In the inspector, find the Page shell section. This controls the outer page — the part that reaches the paper’s edge.
- Under Background image, click Upload background image and choose your dark A4 artwork. It fills the page edge to edge automatically.
- Leave the four padding values at
0— the document already keeps a comfortable margin inside the bleed. - Add a Scrim — a subtle wash over the image that keeps text legible. Set Scrim color to a near-black like
#05070Fand nudge Scrim strength to roughly 18%.
No image? Set Background color to a deep navy such as #070B18 instead. Either way, the builder recognizes a dark page and automatically cleans up the base template’s light-page touches (the white quote card, zebra-striped table rows, the muted bold accent) so your colors show through cleanly.
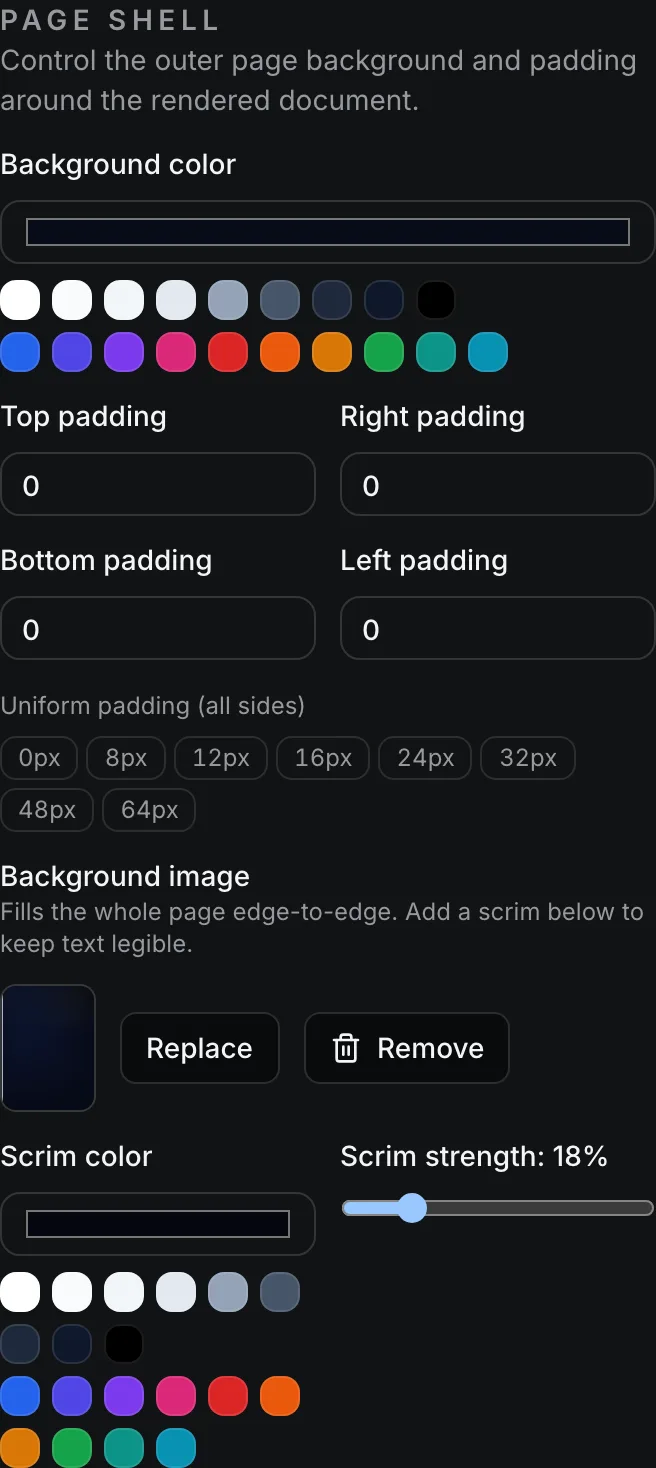
Page shell: a full-bleed background plus a gentle scrim for legibility.
Step 3 — Place your logo and footer
Still in the inspector, open the Branding section:
- Brand name:
Aurelia - Subtitle:
Brand Strategy Studio - Footer text:
Aurelia Brand Studio · Confidential— this becomes the running footer printed at the bottom of every page.
Next, select the Header block on the canvas. In the Selected block panel, click Upload image and choose your transparent wordmark PNG. It appears as a slim masthead at the top of the page.
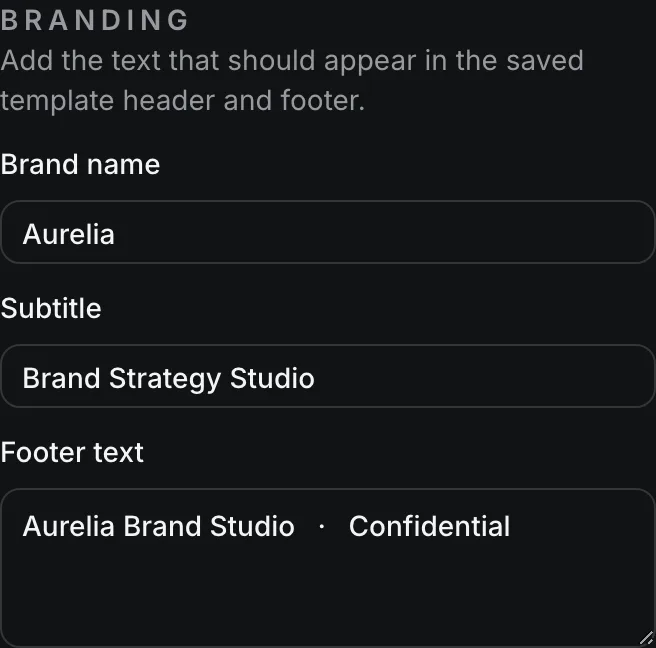
Branding text feeds the header and the running page footer.
Step 4 — Style the header line
With the Header block still selected, scroll the Selected block panel:
- In Text, type a short, confident line:
Brand Strategy Studio · Confidential. - Set Text color to a muted warm grey-gold such as
#A7A08Bso it whispers rather than shouts. - Set Alignment to Center so it sits centered beneath the wordmark.
- Add a little Margin bottom (around
28) to separate the masthead from the title.
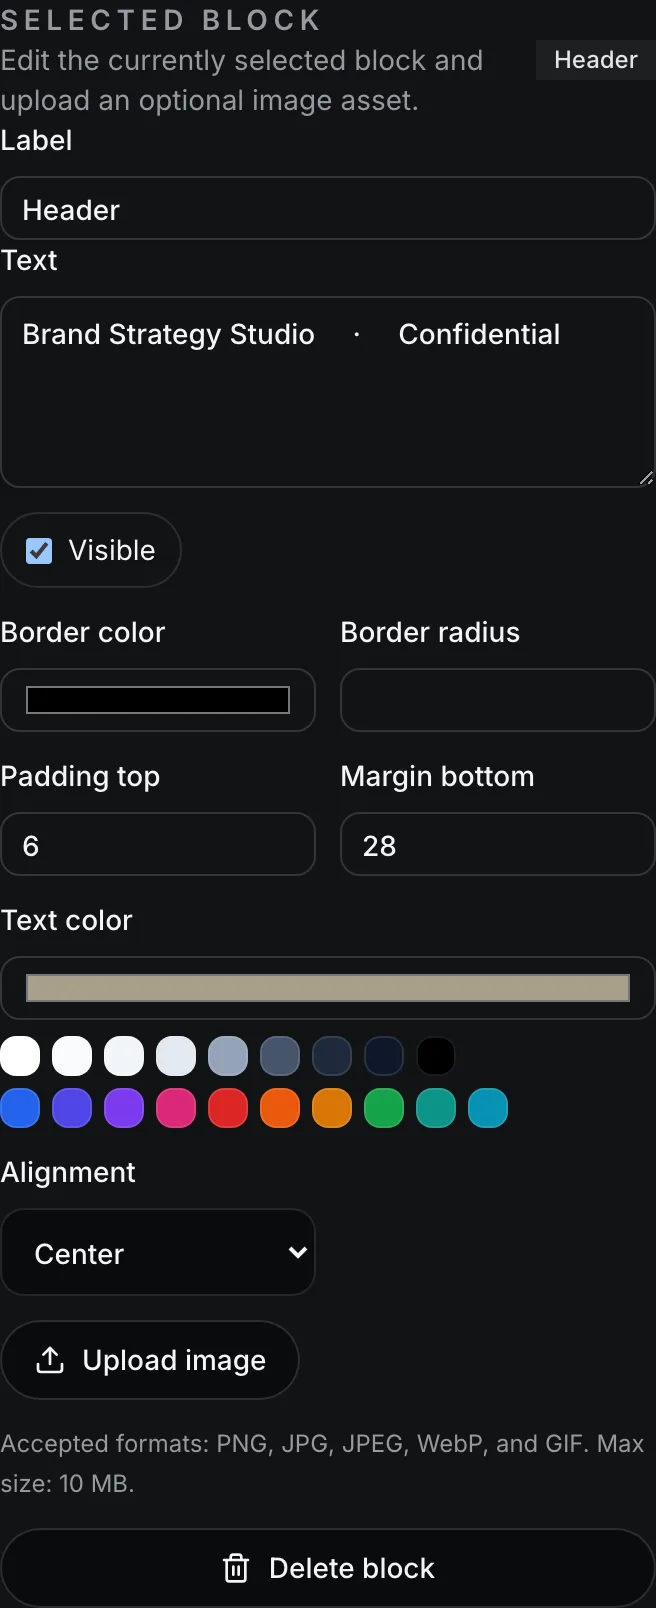
Per-block Text color and Alignment let header and footer text shine on a dark page.
Step 5 — Set premium typography
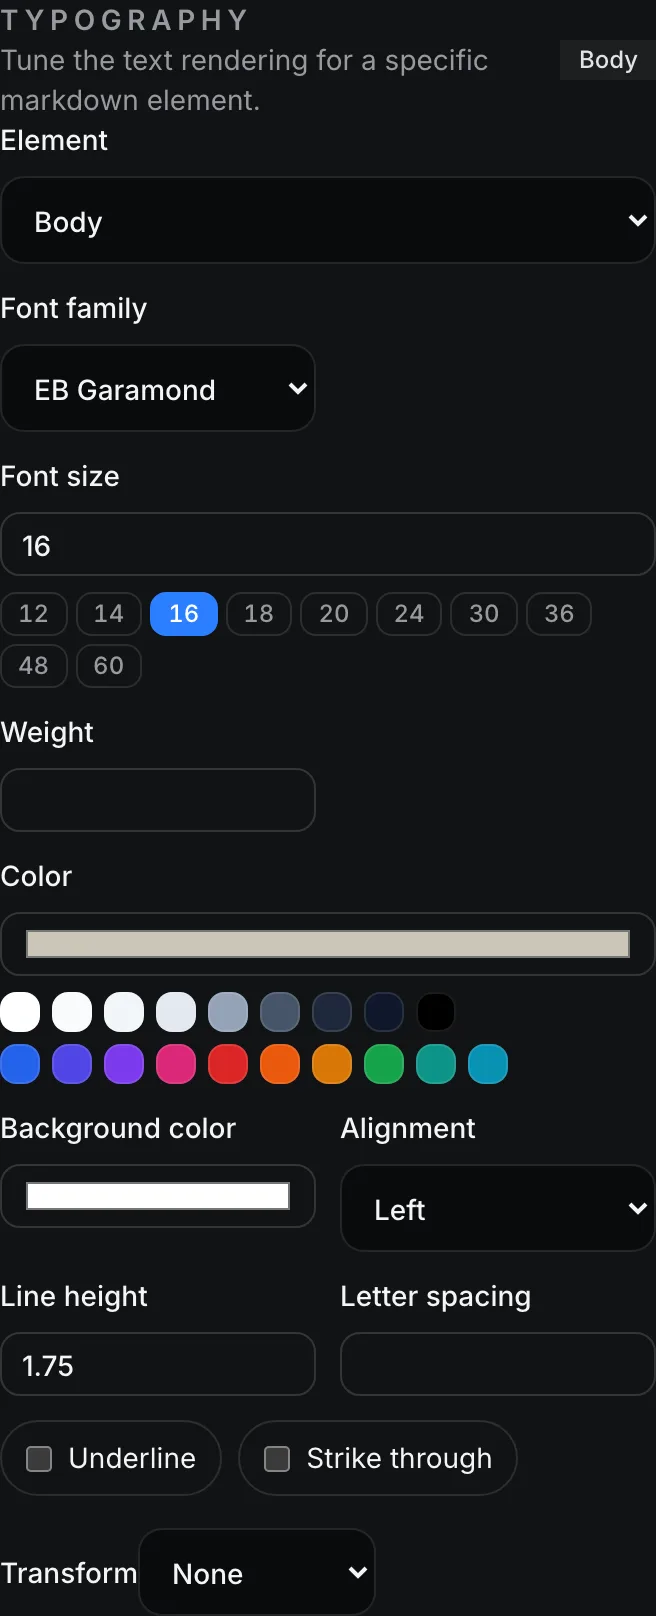
This is where a template stops looking like a document and starts looking like a brand. Open the Typography section and style each element using the Element dropdown. Aurelia uses two fonts only — restraint reads as premium.
| Element | Font | Size | Color | Notes |
|---|---|---|---|---|
| Body | EB Garamond | 16 | #CBC6B8 |
Line height 1.75 for an airy, editorial feel |
| Heading 1 | DM Serif Display | 40 | #F3EEE2 |
The report title — warm near-white |
| Heading 2 | DM Serif Display | 25 | #C9A44E |
Gold section heads |
| Heading 3 | EB Garamond | 13 | #B6AD94 |
Uppercase, letter spacing 3 — a small-caps kicker |
| Blockquote | EB Garamond | 21 | #E6D3A3 |
A gold-ruled pull quote |
| Table header | EB Garamond | 13 | #F3EEE2 |
Uppercase, letter spacing 1.5 |
For each row: pick the element, choose the Font family, type the Font size, click the Color swatch, and set the extras (Letter spacing, Transform, Line height). The key to a dark template is Color — set light text colors here and the page comes alive.
Per-element typography. Pick an element, then style only that element.
Step 6 — Preview, test, and save
- Expand Exact PDF preview under the canvas to see a faithful render of the page.
- Test with real content. Paste a genuine document — headings, a table, a quote, lists — and confirm everything stays legible. Aurelia handles a positioning matrix and a roadmap without a wobble.
- Click Save template. It now appears in your Template library and is ready to use anywhere.

Real content — tables, lists, bold lead-ins — styled to stay crisp on the dark page.
Step 7 — Use your template in the converter
- Open the converter (the Convert link, or Open converter from the builder).
- Paste or write your Markdown.
- Under Saved templates, select Aurelia — Brand Strategy Report.
- Click Download Premium PDF.
That’s it — your Markdown comes out as a fully branded, watermark-free report.
Step 8 — Automate with the API
Once a template is saved, you can generate the same branded PDF programmatically — perfect for turning AI output, CMS content, or scheduled reports into client-ready documents.
1. Create an API key. Go to Dashboard → API keys and create one. It starts with mp_live_ and is shown only once, so copy it somewhere safe.
2. Find your template’s ID. While signed in, open https://markdowntopdfconverter.com/api/custom-templates in your browser. The JSON response lists every saved template with its id — copy the one you want.
3. Call the convert endpoint. Send your Markdown plus the customTemplateId:
curl -X POST https://markdowntopdfconverter.com/api/v1/convert \
  -H "Authorization: Bearer mp_live_YOUR_API_KEY" \
  -H "Content-Type: application/json" \
  -d '{
    "markdown": "## Northwind Outdoor — Brand Strategy\n\nYour report content in Markdown…",
    "templateId": "executive",
    "customTemplateId": "YOUR_TEMPLATE_ID",
    "filename": "northwind-brand-strategy",
    "options": { "pageNumbers": true }
  }' \
  --output northwind-brand-strategy.pdf
The same request in Node.js:
const res = await fetch("https://markdowntopdfconverter.com/api/v1/convert", {
  method: "POST",
  headers: {
    Authorization: `Bearer ${process.env.MP_API_KEY}`,
    "Content-Type": "application/json",
  },
  body: JSON.stringify({
    markdown: "## Northwind Outdoor — Brand Strategy\n\nYour report content…",
    templateId: "executive",
    customTemplateId: "YOUR_TEMPLATE_ID",
    filename: "northwind-brand-strategy",
    options: { pageNumbers: true },
  }),
});

const pdf = Buffer.from(await res.arrayBuffer());
The response is the PDF file itself (Content-Type: application/pdf). Pass customTemplateId to apply your saved design; set templateId to its base template (here, executive). See the full API documentation for every option.
Design tips for premium results
- Two fonts, maximum. Pair one display serif with one book serif (or a clean sans). Create hierarchy with size, weight, and color — not more fonts.
- Let the page breathe. Generous line height and a quiet scrim do more for “premium” than any extra ornament.
- Make contrast deliberate. On a dark page, reserve your brightest tone for the title, a gold for section heads, and a soft off-white for body text.
- Transparent logos only. A wordmark on a transparent PNG sits cleanly on any background; a white-boxed logo will not.
- Test before you ship. Always preview with real content — long headings, a wide table, a code block — so nothing surprises you later.
Next steps
- Compare the six built-in starting points in the template comparison guide.
- New to the app? Start with the getting started guide.
- Ready to automate? Dive into the API documentation.